
Silicone Rough Edges: 3 Causes and 3 Fixes
Silicone rough edges are the first defect buyers notice and the last one most factories explain properly. The part arrives, the surface looks fine, but the edge is jagged, fuzzy or torn — and nobody can tell you which stage caused it.
There are only three real causes: curing out of control, a worn cutting edge on the mold, or the way the flash was trimmed. Each leaves a different fingerprint on the edge, which means you can usually identify the culprit from the part in your hand before you call the supplier.
This guide breaks down all three, how to tell them apart, and the six questions that separate a molder who controls the process from one who sorts defects at the end of the line.
What Causes Silicone Rough Edges: Three Failure Points
Silicone rough edges come from one of three stages, and the fix differs completely depending on which one it is:
- Curing — temperature, time or post-cure is wrong, so the material is too brittle or too soft to tear cleanly.
- Mold cutting edge — the steel edge that severs flash has worn, so flash no longer separates at the parting line.
- Trimming technique — the operator pulls at the wrong angle or with too much force and tears the edge instead of cutting it.
In our own rejection data, curing accounts for roughly 30–40% of edge complaints, mold wear for another 40%, and trimming for the remainder. The distribution is not the point. The point is that these three produce visually different defects, and treating one as another wastes weeks.
Cause 1: Curing Out of Control
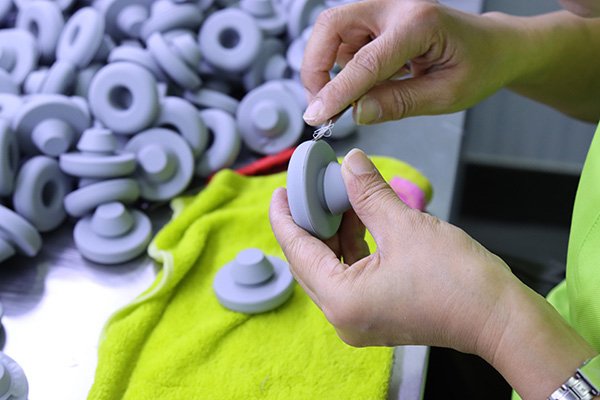
Curing problems are the first and most common source of silicone rough edges: the edge looks brittle or sticky rather than thick.
Over-cured or too hot. When the cavity runs above the compound's optimum or the cycle runs long, the silicone cross-links past its peak. Internal stress builds, shrinkage increases, and the material loses toughness. At the trim bench it does not cut — it snaps, and the break line runs wherever the stress happens to concentrate.
Under-cured. The opposite failure. The part feels soft and slightly tacky, and the flash bonds back to the body instead of separating. Operators compensate by pulling harder, which tears the edge.
| Condition | What the part feels like | Edge result |
|---|---|---|
| Temperature too high | Firm, slightly glossy, brittle at thin sections | Chipped, cracker-like break along the edge |
| Cycle time too long | Hard, low elongation | Tears instead of trimming; ragged break line |
| Under-cured | Soft, tacky, weak rebound | Flash re-adheres; edge pulls rather than separates |
The control is a curing curve developed per part, not a single recipe applied to the whole press hall. Thick sections and thin sections cannot share the same dwell time, and a 15-minute cycle cut to 10 to hit a ship date will show up on the edge three days later.
Cause 2: Worn Cutting Edge on the Mold
This is the cause that develops silently. The same mold produced perfect parts in January and rough parts in June, with no change to material, operator or machine setting.
The cutting edge is the narrow steel land at the parting line that severs flash from the part. It works at cavity temperatures near 170–200°C under repeated clamping pressure, thousands of cycles per month. The edge dulls progressively, and the flash stops separating — it starts to stretch.
| Edge condition | Parting line | What trimming does |
|---|---|---|
| Sharp | Thin, clean, hairline | Separates with light pressure, flat edge |
| Slightly worn | Thicker, slightly blurred | Needs more force, minor burrs |
| Severely dull | Thick, merged into the body | Cannot separate; must be torn, obvious jagged edge |
Two things follow from this. First, a mold maintenance schedule based on cycle count, not on complaints — we pull every mold for edge inspection and re-sharpening at a fixed interval regardless of how the parts look. Second, buyers should ask for that interval. A supplier who cannot state it is inspecting molds only after a customer rejects a batch.
Tool steel grade matters here too. Hardened H13 or stainless grades hold the edge longer than soft cavity steel, and the material callout on the drawing should specify both the compound and the tool steel.
Cause 3: Trimming Technique
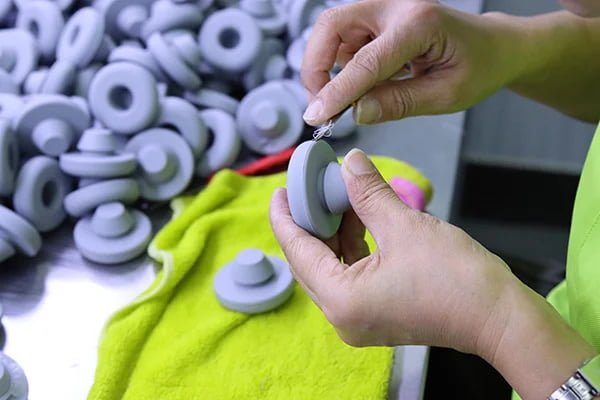
Assume the cure is right and the mold is new — the third source of silicone rough edges is the trim bench. It is the least technical and the hardest to audit.
A technician who pulls perpendicular to the parting line stretches the edge before it separates, and stretched silicone tears. The correct motion follows the parting line angle with even pressure, at a pace slow enough to stay in control but fast enough that the flash does not re-adhere.
| Variable | Correct | Incorrect |
|---|---|---|
| Force | Even, light, along the path of least resistance | Brute force; edge stretches then tears |
| Angle | Along the parting line | Perpendicular or backwards; uneven stress, notches |
| Speed | Steady, controlled | Too fast loses control; too slow lets flash re-adhere |
This is the part of the process most exposed to labor turnover. A technician with two weeks of practice produces visibly different edges from one with two years, and the difference shows up as a 2–4 point swing in first-pass yield. That is why the training curve, not the tooling, is often the constraint on a new program.
How to Tell Which Cause You Have
Put the part under a light and look at the edge profile. Each cause of silicone rough edges leaves a different signature, and the distinction matters because the corrective action goes to a different department.
| What you see | Most likely cause | Who fixes it |
|---|---|---|
| Edge is thin but chipped, like broken glass | Over-cure or excessive temperature | Process engineering |
| Edge is thick and fuzzy, flash merged into the body | Worn mold cutting edge | Tool room |
| Edge is smooth in places, torn in others | Trimming technique | Production training |
| Edge is sticky and flash will not release | Under-cure | Process engineering |
| Edge varies between cavities in the same mold | Cavity temperature imbalance | Tool room and process |
If the defect appears on one cavity only, it is a tool or heat-balance problem. If it appears across every cavity on one press, it is a process setting. If it appears across every press on one shift, it is people.
Six Questions to Ask a Supplier About Edge Quality
These six answers show whether a supplier controls silicone rough edges inside the process or sorts them out at the end of the line.
- What is your mold maintenance interval, and is it based on cycle count? A number in cycles is a controlled process. "When we see a problem" is not.
- Do you develop a curing curve per part, or use a standard cycle? Ask to see one curve for a part with mixed wall thickness.
- What is your first-pass yield on trimming, and how do you measure it? Yield without a measurement method is a guess.
- How long does a new trimming technician train before working on customer parts? Two days and two months produce different edges.
- Do you inspect the parting line at incoming inspection, or only the dimensions? Dimensional inspection passes a jagged edge every time.
- What acceptance criteria do you use for edge finish? Ideally a written visual standard with photo limits, referenced in the Control Plan and reviewed under ISO 9001.
How We Control It
Three controls do most of the work on our lines.
Curing curves per part, validated before production. Every new tool gets a temperature and time study across the cavity, not a single thermocouple reading. Curves are stored with the work order so a re-run uses the same profile.
Mold maintenance on a cycle-count schedule. Cutting edges are inspected and re-sharpened at fixed intervals, and every mold carries a maintenance record that travels with the tool.
A written edge standard with photo limits. Inspectors compare against a photo boundary sample, not a verbal description. New trimming staff work on scrap until they pass the same standard.
If a batch does develop edge defects, the same discipline applies as with other failure modes: contain, audit 100% of stock, fix the process, then verify over consecutive runs. We documented that sequence in our mixed parts case study.
Frequently Asked Questions
Can silicone rough edges be fixed after molding?
Only cosmetically in most cases. Re-trimming removes material and changes the dimension; a torn edge cannot be restored. If the cause is under-cure, the part cannot be salvaged by trimming at all — reject the batch.
Why do only some cavities produce rough edges?
Cavity temperature imbalance. One cavity runs hotter or cooler than the rest, so its cure differs from the others on the same cycle. Check the heat profile before changing any process setting.
Is a rough edge a cosmetic defect or a functional one?
Usually functional. A torn edge on a seal, grommet or cable gland creates a leak path and a stress concentration point. Even where it is purely cosmetic, silicone rough edges signal that the process is not in control.
Does harder silicone produce cleaner edges?
Harder compounds trim more cleanly because they resist stretching, but they also chip more easily when over-cured. The relationship is not "harder is better" — it is "cure to the right hardness and maintain the cutting edge".
How much does edge quality affect part cost?
Directly, through yield. A 3-point drop in first-pass yield on a high-volume part costs more than the mold maintenance that would have prevented it, which is why the cheapest suppliers are often the ones with the most manual sorting.
Schlussfolgerung
Silicone rough edges are a process signature, not a cosmetic accident. Curing leaves a chipped or sticky edge, mold wear leaves thick fused flash, and trimming leaves a torn line. Match the signature to the cause and the fix becomes obvious — and it usually costs far less than the sorting labor it replaces.
If you are sourcing silicone parts and want to see how the edge standard is applied, send us your drawings for a free DFM review. For tooling economics before you commit, our breakdown of custom silicone mold cost and the 10-point DFM checklist cover the decisions that determine edge quality later.
About the Author & Dibo Tech
My name is Kunfa Ye, but friends call me Jeff. I was born in 1986, the year of the Tiger. In 2011, my brother Autumn Ye and I co-founded Dibo Tech, rooting ourselves in the silicone rubber industry for fifteen years. Building from scratch, we navigated industry cycles and learned the true rewards of hard work. We have always built our business on technical expertise and integrity.
The silicone industry touches every corner of modern manufacturing. I deeply believe that behind every product lies trust, and the essence of business is mutual gain. Over these years, my proudest achievement is not personal financial independence, but helping our clients optimize supply chains and boost production efficiency. Their success is far more rewarding than personal milestones. Today, I aim to give back by sharing insights, answering engineering questions, and connecting resources.
Brand Name: Dibo Tech Slogan: Dibo Technology Silicone Manufacturing Specialists Website: https://samxine.com/ Our Mission: Based on strong technical capabilities and quality first, we are committed to innovative and eco-friendly silicone rubber production, providing reliable silicone solutions while fulfilling social responsibilities for a sustainable future.
Schreibe einen Kommentar